GitHub Apps are a GitHub's preferred way to build more sophisticated functionality on top of GitHub. GitHub apps are a separate concept from GitHub OAuth Apps, which causes a lot of confusion.
Here's how you can think of the difference: GitHub OAuth Apps can act on behalf of a user, but GitHub Apps are distinct "users" that can act on their own. If you authorize a GitHub OAuth App and that app posts on an issue, it looks as if you posted it. But if you install a GitHub App and that app posts on an issue, the post comes from a distinct user.
Getting Started
Let's build a GitHub app that enforces pinning exact dependencies
in package.json: no ^, >=, or *.
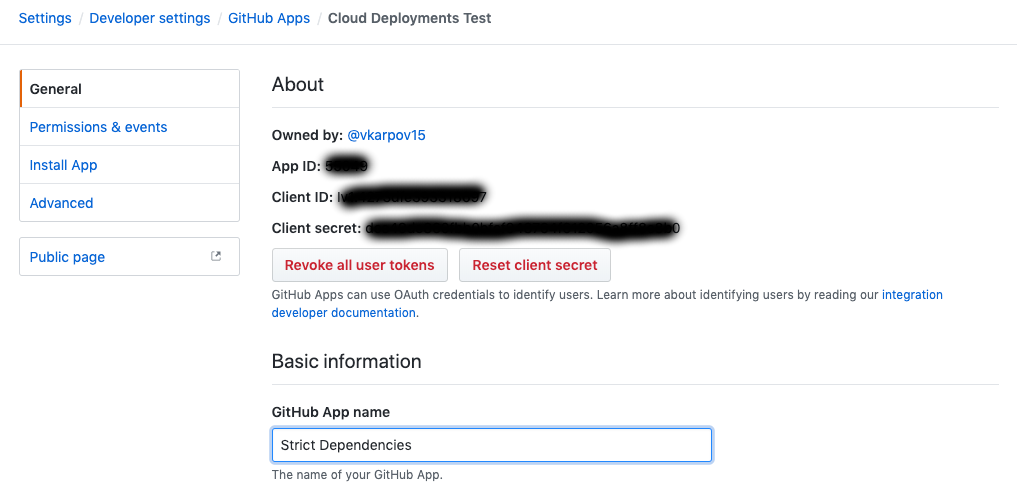
Go to your GitHub developer settings and create a new GitHub App. Make sure to note your GitHub App ID, Client ID, and Client secret.
You should also set up your webhook URL. Another key difference
between apps and OAuth apps is that GitHub lets you configure
a webhook that GitHub posts to every time an event occurs. This lets your app
react to GitHub activity, like checking package.json whenever
there's a push to master.
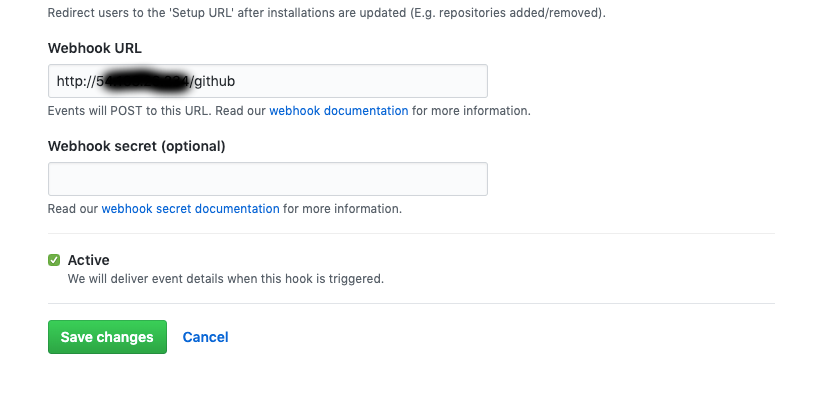
You can set up a minimal Express server on an EC2 instance and point the GitHub webhook to it.
const express = require('express');

const app = express();
app.use(express.json());

app.post('/github', function(req, res) {
  console.log('Github post', req.body);
  res.json({ ok: 1 }); // Doesn't matter, can be any response
});

app.listen(80);
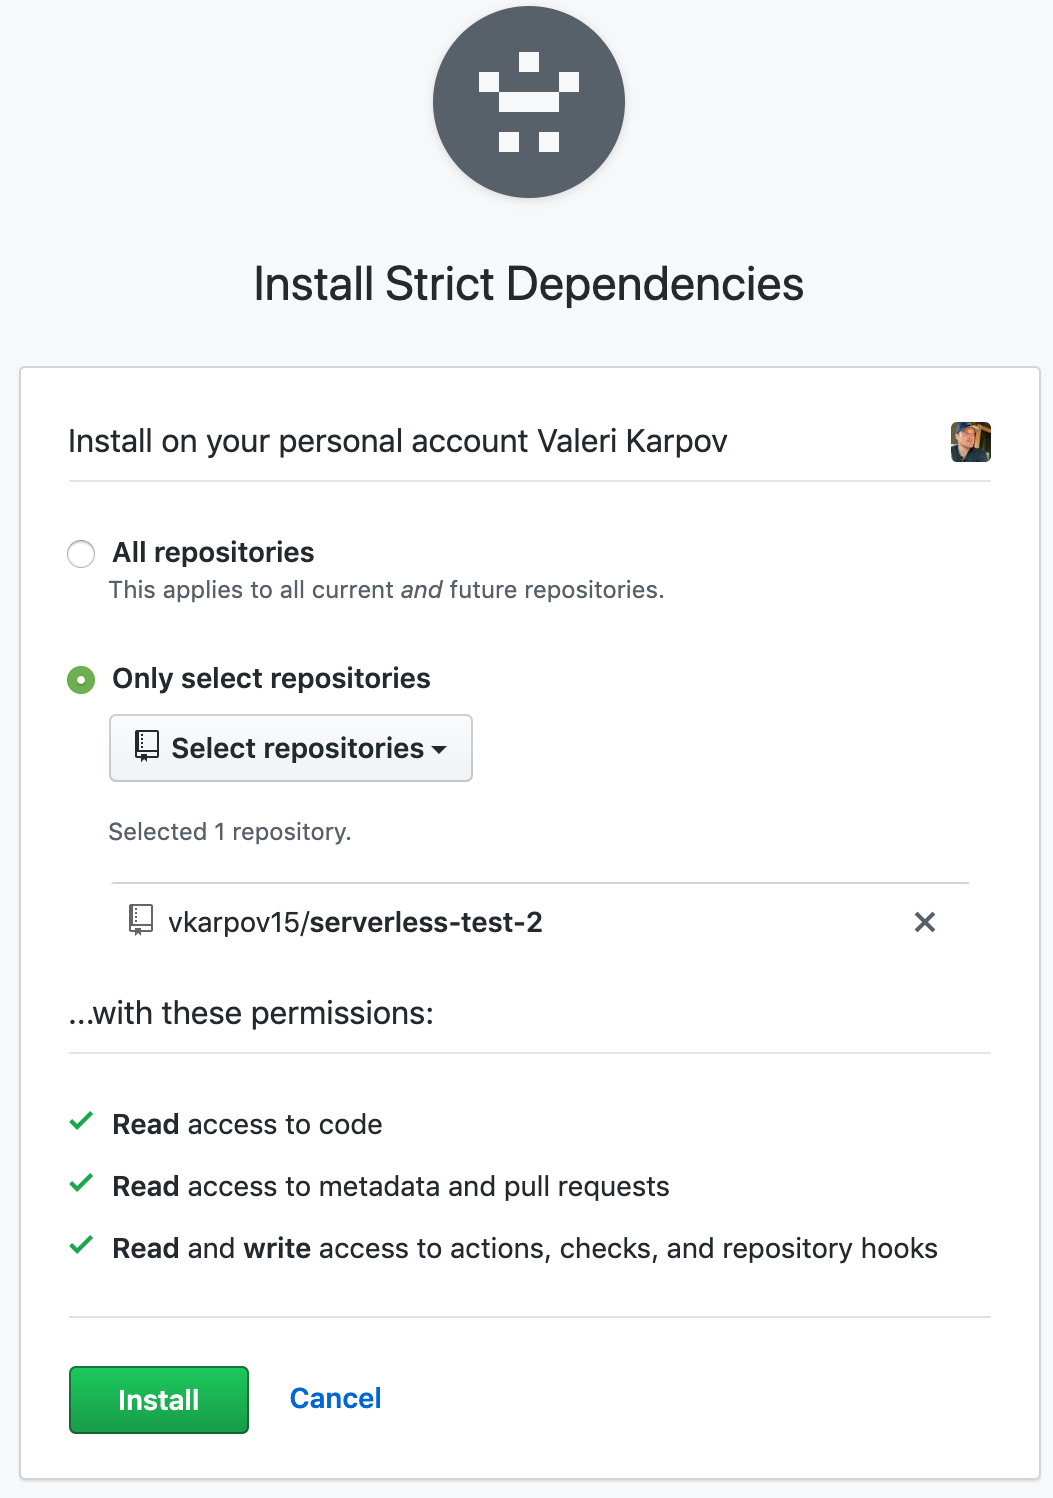
Once you've created the app, go to Developer Settings > Install App, and install the app on your personal account.

Once you click install, you should see the below screen. To avoid getting hooks for all of your GitHub activity, just install the app with access to a test repo as shown below.
When you make a commit and git push origin master to your
test repo, GitHub will send an HTTP post to your endpoint,
and you'll get the below request body. For brevity, I excluded
a bunch of irrelevant information from the request body.
{
  ref: 'refs/heads/master',
  before: '74368a8c700c1632c8e3a79f87f4bfa5eabc8348',
  after: 'ff3b2d88adcacf6f632664c665a55c525cadf5f7',
  repository: {
    id: 242404484,
    node_id: 'MDEwOlJlcG9zaXRvcnkyNDI0MDQ0ODQ=',
    name: 'serverless-test-2',
    full_name: 'vkarpov15/serverless-test-2',
    private: false,
    owner: {
      name: 'vkarpov15',
      email: 'val@karpov.io',
      login: 'vkarpov15',
      id: 1620265,
      // ...
    },
    // ...
  },
  pusher: { name: 'vkarpov15', email: 'val@karpov.io' },
  sender: {
    login: 'vkarpov15',
    id: 1620265,
    // ...
  },
  installation: {
    id: 7128926,
    node_id: 'MDIzOkludGVncmF0aW9uSW5zdGFsbGF0aW9uNzEyODkyNg=='
  },
  // ...
  commits: [
    {
      id: 'ff3b2d88adcacf6f632664c665a55c525cadf5f7',
      tree_id: 'cb7043ef1c4701984e9bfd843745bd75fed9b51c',
      distinct: true,
      message: 'test webhooks!',
      timestamp: '2020-03-03T21:40:25-06:00',
      // ...
    }
  ],
  head_commit: // ...
}
Making Your First Request
Making a request to GitHub's API as an app is slightly trickier than making a request after logging in with OAuth. There are two things you need besides just your client id and client secret:
- Your installation id. Note that the webhook request body has a
installation.idproperty. An installation represents a user installing your app: in order to make a request to the GitHub API, you need to reference an installation. - A private key for your app.
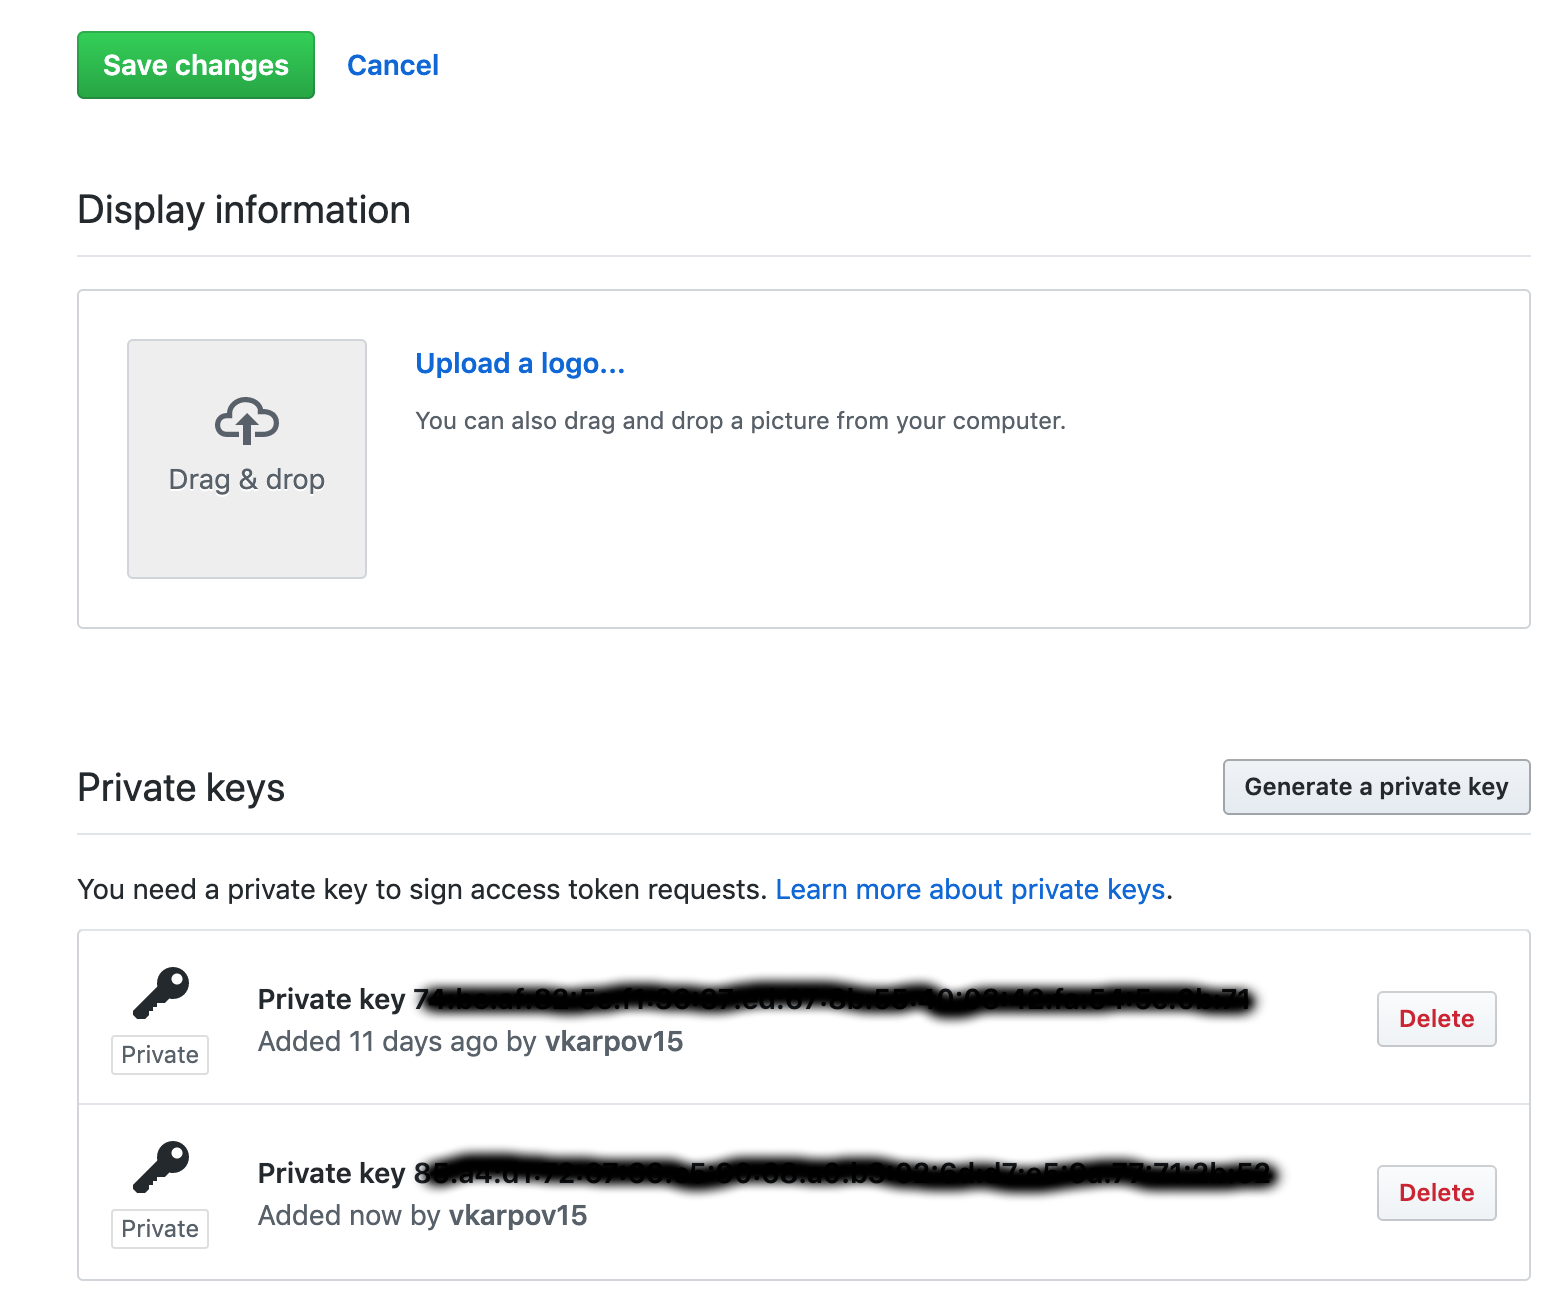
To generate a private key, go to Developer Settings > GitHub Apps > Your App Name > General, and click on "Generate Private Key" at the bottom of the page.
Creating a JWT for authenticating as your GitHub app is tricky
on your own. I recommend using GitHub's official auth-app npm module, which handles all that for you. Once you have a JWT, you can use any
HTTP client, like axios, to
make requests to the GitHub API.
First, use the @octokit/auth-app npm package to create an
auth object:
const { createAppAuth } = require('@octokit/auth-app');
const fs = require('fs');

// Replace with the path to your private key file
const pem = fs.readFileSync('./key.pem', 'utf8');

// This function creates a JWT that you can use with
// Axios or any other HTTP client to make requests to
// GitHub as your app.
async function createJWT(installationId) {
  const auth = createAppAuth({
    id: /* Your app id */,
    privateKey: pem,
    installationId,
    clientId: /* Your client id */,
    clientSecret: /* Your client secret */
  });

  const { token } = await auth({ type: 'installation' });
  return token;
}
Now that you can create a JWT, you can make a request to GitHub using the JWT. To use the JWT, you need to set the authorization header to 'bearer' followed by the JWT.
async function githubRequest(url, installationId) {
  const token = await createJWT(installationId);

  const res = await axios.get(`https://api.github.com${url}`, {
    headers: {
      authorization: `bearer ${token}`,
      // Because the GitHub API is in some sort of preview stage
      accept: 'application/vnd.github.machine-man-preview+json'
    }
  });

  return res.data;
}
Below is the full code for a server that listens to
a GitHub webhook and makes an HTTP request to load the
package.json file from the GitHub repo whenever
there is a new push to the master branch using the
GitHub contents API:
const axios = require('axios');
const { createAppAuth } = require('@octokit/auth-app');
const express = require('express');
const fs = require('fs');

const pem = fs.readFileSync('./key.pem', 'utf8');

run().catch(err => console.log(err));

async function run() {
  const app = express();
  app.use(express.json());

  app.post('/github', function(req, res) {
    console.log('Github post', req.body);

    if (req.body != null && req.body.ref === 'refs/heads/master') {
      const installationId = req.body.installation.id;
      getPackageJSON(req.body.repository.full_name, installationId);
    }
  });

  app.listen(80);
}

async function getPackageJSON(repo, installationId) {
  const pkg = await githubRequest(`/repos/${repo}/contents/package.json`, installationId).
    then(res => res.content).
    then(content => Buffer.from(content, 'base64').toString('utf8'));
  console.log('package.json:', pkg);
}

async function createJWT(installationId) {
  const auth = createAppAuth({
    id: /* your id */,
    privateKey: pem,
    installationId,
    clientId: /* your client id */,
    clientSecret: /* your client secret */
  });

  const { token } = await auth({ type: 'installation' });
  return token;
}

async function githubRequest(url, installationId) {
  const token = await createJWT(installationId);

  const res = await axios.get(`https://api.github.com${url}`, {
    headers: {
      authorization: `bearer ${token}`,
      accept: 'application/vnd.github.machine-man-preview+json'
    }
  });

  return res.data;
}
Creating a Check Run
A check run is one of those fancy checkmarks that shows up when you use a CD tool like CircleCI that shows whether your tests succeeded or failed on an individual commit.

Now that the GitHub webhook server can make requests to the
GitHub API, the webhook server should be able to check
the dependencies and devDependencies in package.json,
and show a red "X" on commits that use semver ranges.
First, let's write a function that checks for semver ranges in a JavaScript object:
// Given an object, return true if all the values
// are semver version strings. `1.2.3` is OK, `>=1.2.3`
// is not.
function isStrictDependencies(deps) {
  return !Object.keys(deps).find(key => {
    return !/^\d+\.\d+\.\d+$/.test(deps[key]);
  });
}
Next, the app needs to send a POST request to create a nice green checkmark on the commit when there are no semver ranges, or a red "X" when there are semver ranges.
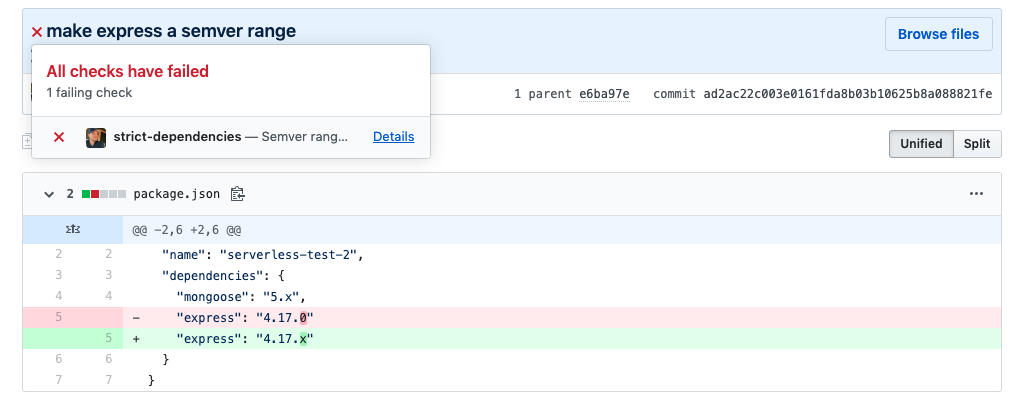
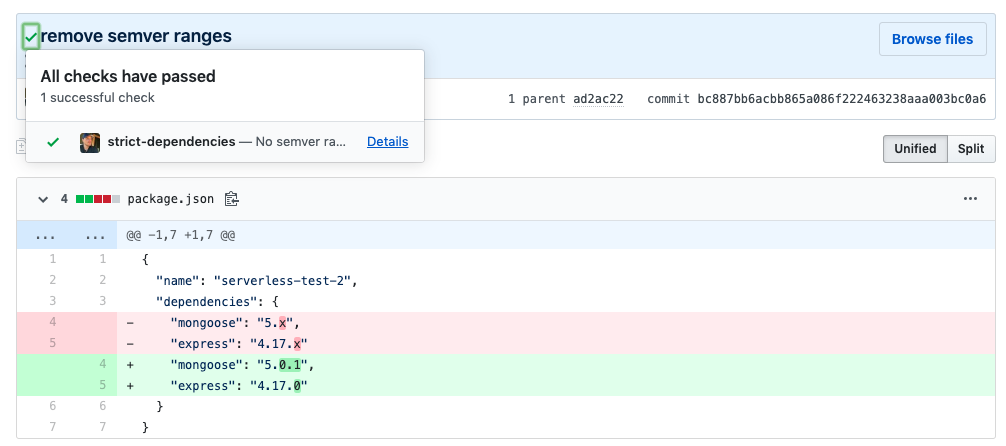
The check runs API requires you to specify the SHA of the
commit you're adding a check run to. GitHub sends the commit
SHA to your webhook in the after property:
  app.post('/github', function(req, res) {
    console.log('Github post', req.body);

    if (req.body != null && req.body.ref === 'refs/heads/master') {
      const installationId = req.body.installation.id;
      const sha = req.body.after;
      checkPackageJSON(req.body.repository.full_name, installationId, sha);
    }
  });
Next, the app needs a function that checks the package.json
dependencies for semver ranges, and sends an HTTP POST to
the /check-runs endpoint:
async function checkPackageJSON(repo, installationId, sha) {
  let pkg = await githubRequest(`/repos/${repo}/contents/package.json`, installationId).
    then(res => res.content).
    then(content => Buffer.from(content, 'base64').toString('utf8'));

  try {
    pkg = JSON.parse(pkg);
  } catch (err) { return; }

  const ok = isStrictDependencies(pkg.dependencies);
  await githubRequest(`/repos/${repo}/check-runs`, installationId, 'POST', {
    name: 'strict-dependencies',
    head_sha: sha,
    status: 'completed',
    conclusion: ok ? 'success' : 'failure',
    output: {
      title: ok ? 'No semver ranges found' : 'Semver ranges found!',
      summary: ok ? 'Good job!' : 'Found a semver range in `dependencies`'
    }
  });
}

async function githubRequest(url, installationId, method, data) {
  const token = await createJWT(installationId);
  if (method == null) {
    method = 'get';
  } else {
    method = method.toLowerCase();
  }

  const accept = url.includes('/check-runs') ?
    'application/vnd.github.antiope-preview+json' :
    'application/vnd.github.machine-man-preview+json';

  const res = await axios({
    method,
    url: `https://api.github.com${url}`,
    data,
    headers: {
      authorization: `bearer ${token}`,
      accept
    }
  });

  return res.data;
}

// Given an object, return true if all the values
// are semver version strings. `1.2.3` is OK, `>=1.2.3`
// is not.
function isStrictDependencies(deps) {
  return !Object.keys(deps).find(key => {
    return !/^\d+\.\d+\.\d+$/.test(deps[key]);
  });
}
Moving On
Building a GitHub app sounds intimidating, but it mostly comes down to building an Express server that makes some HTTP requests. Once you get past the tricky part of figuring out how to authenticate against the GitHub API, building your own code checks is fun and easy. I'm looking forward to building some GitHub apps to automate repetitive tasks.


